Pages

Saturday, February 9, 2013

Kale, Pineapple, and Almond Milk Smoothie

First and foremost, I found out yesterday that one of my favorite magazines, Whole Living, will no longer be published.  I received a check in the mail from Martha Stewart Omnimedia that said it was for a cancellation of my Whole Living subscription.  When I called them to find out why I had received the check, they said that the January/February issue was their last issue.  Then I got a message on my Kindle stating that they are going to try to incorporate certain aspects of Whole Living into other Martha Stewart Omnimedia magazines.  So sad :(

One of my favorite things about Whole Living has been their healthy recipes.  I am planning on doing their Whole Living Challenge from previous years later this month.  In the meantime, I thought I'd check out some of their smoothie recipes.

I had most of the ingredients on hand to make the Kale, Pineapple, and Almond Milk Smoothie from Whole Living.


Kale, Pineapple, and Almond Milk Smoothie
1 cup unsweetened almond milk
1 cup packed chopped kale
1/2 cup pineapple juice
1/2 cup diced pineapple (I used frozen pineapple because I really wanted that nice frozen texture)
1 banana

Puree ingredients in a blender until smooth.

Only 3 Weight Watchers points!!!


Here are the ingredients in the blender before I mixed them:


Here is how it looks after mixing it:


Review:
The smoothie was surprisingly good.  I was worried about mixing the almond milk and the pineapple juice together.  In retrospect, I would have probably blended the pineapple juice and kale together first before adding the other ingredients.  If you are trying to get a good consistency and keep blending (which is what I normally do), the almond milk gets a little too frothy when over-blended   Also, I would leave out the banana.  I like bananas plain, but not added in smoothies.  It overpowered the pineapple, in my opinion.  When I make this again, I will most likely add more pineapple in place of the banana.

I would probably also slightly freeze my almond milk and pineapple juice.  I really like a cold frozen smoothie texture.  It makes me feel like I'm eating dessert instead of veggies and fruit.

It also said that it makes two servings.  I filled a standard glass up and still had about 1/4 cup left over.  This would probably make a great size adult meal serving instead of two servings.  If you are only drinking it as a snack, it is definitely enough for two people.

I supplemented my smoothie with some Lacinato kale chips.  I had some extra kale left over from my smoothie and didn't want it to go bad.


I liked using the Lacinato kale instead of the curly kale this time.  Although I do love the fun texture of the curly kale, this kale cooked more evenly since it was flat.  I lightly brushed it with olive oil and sprinkled it with sea salt.  I baked it for about 10-15 minutes in a 325 degree oven.  Here's a picture of my finished product (please excuse the crappy cell phone pic):


If you try this recipe out, please let me know what you think of it and any modifications you plan on making to it in the future.  I always love to hear other opinions.

Thursday, January 31, 2013

Kale Fruit Smoothie

When I weighed myself on Tuesday morning and logged my weight into my Weight Watchers app, I ended up losing 2 points per day.  While that's great because it means I'm losing weight, it's not so great in terms of watching what I eat.  I'm going to have to cut those 2 points out of my daily diet.  Smoothies and juices are a quick, delicious, fun way to get some fruit/veggies in while keeping those Weight Watchers points low.  And tonight, on my busy Wednesday nights, I was DYING for some Chick-fil-A chicken nuggets (also another quick, delicious, fun way to eat something, but not as healthy).  Damn you, chicken nuggets!!!  I didn't have the points allowance left for the day to get what I wanted at Chick-fil-A (hey, that kind of rhymed), so I headed home for a date with the blender.

Pete bought a juicer after watching "Fat, Sick, & Nearly Dead" a little over a year ago.  He was juicing religiously and feeling great.  However, I couldn't find a combination of fruits/veggies that I was satisfied with that didn't taste like I was drinking grass.  Alas, our juicer kicked the bucket within two weeks and got returned to the store.  We took a juicing class, got to try out different types of juicers, and are trying to bring ourselves to drop the money on the juicer we want (more on that another day).  But in the meantime, I have a perfectly functioning blender that I can use to whip up healthy smoothies.  I've been making them for over a year, pretty much with the same ingredients.  I usually include only fruit, but have been trying to reintroduce some of those veggies that we used while juicing.

I try to keep frozen fruit in the freezer that I can use to quickly whip up a healthy dessert smoothie if I want instead of reaching for ice cream when I want something cold.  So, the only thing I had to purchase this week was some kale.  Here is what I used below:

Kale Fruit Smoothie
1 cup frozen pineapple
1 1/2 cup (estimate) frozen strawberries
1 cup orange juice
1 cup chopped kale (I used Lacinato kale)


Don't hate on my closeup of my crappy chopping skills.  Pete doesn't know I was in the kitchen after "Disposal-Gate 2013."***  Fortunately, I don't think he reads this blog.

Because the strawberries are frozen and need to a little more time than the other fruits/veggies to get chopped up, I put those in first with the orange juice.


Once those were well blended, I added the frozen pineapple and the kale.


All done!  It looks like confetti in the glass.


It blended very easily.  I could have left out some of the orange juice (maybe only use 3/4 cup next time), because it made it a little runnier than I would have liked.  I like mine so thick that you have to eat it with a spoon.  However, if you are on the go and drinking this out of a straw, this was the perfect consistency.  I pre-chopped the kale prior to putting it into the blender and the blender chopped it up into such fine pieces, that the texture was undetectable.  I could barely taste the kale.  As I go along, I am going to add more veggies to my smoothies and take more of the fruit out to find a perfect balance that I can enjoy without it tasting like grass.

For an easy 3 Weight Watchers points for the whole glass, this filled me up, made me feel healthy, and allowed me to have a light dinner before going to bed.  And after sacrificing those two points because of my weight loss, I still had two points left over after this smoothie that I didn't use.

If you have a favorite smoothie recipe, please share it! I'd love to try out new recipes.

***No disposals were hurt in the making of this smoothie.

Monday, January 28, 2013

Christmas Card Reuse

In our home, we do everything we possibly can to reduce waste, reuse items, and recycle.  We're trying to do our best to keep the trash down in landfills and reuse as much as we can without items having to go through the recycle center which will lead to extra money spent on these items to have them recycled, extra water used, and extra electricity used.

I keep all of our photo cards which ends up being most of our Christmas cards.  I was left with a few decorative Christmas cards. And some of them were so cute, I wanted to find a good use for them instead of putting them in the recycle bin.

The easiest thing I could think of was to make Christmas gift tags out of the cards.  We reuse gift bags as long as possible (keep out of the landfill), but we end up with gift bags with used tags.  When I pull the tag off, I need something new to put on the bag without putting something on that would stick and leave residue.  I pulled out a few of the cards that I thought would be easiest to make tags out of.


I then cut out the pieces that I thought would make great gift tags.


To put on the bag, I just punched a hole in the gift tag, and cut a tiny slit that I could use to slide onto the handle.


This was a very quick, under 5-minute project that helps out the environment.  Next year when January rolls around and you're ready to toss those cards, think of ways that you can reuse them instead.  Do your part to help the environment and leave this planet in the best shape we can for our children.


Friday, January 11, 2013

Homemade Kale Chips

I've made homemade kale chips before and they are such a quick, healthy, satisfying snack.  They give me the crunch and the salt that I feel like I am missing from a potato chip.  Here is how I make kale chips:

Ingredients:
1 Bunch of Kale
Olive Oil (I use Whole Foods brand because it's a good olive oil and cheap at only $5.99 for a big bottle)
Sea Salt
Himalayan Seat Salt (purchased from Target)


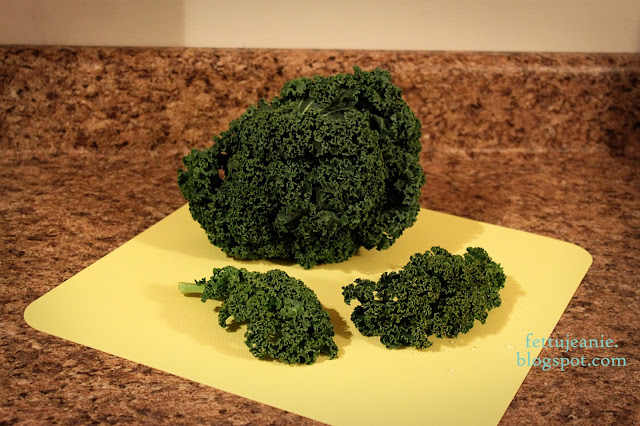
Wash and prepare your kale for cutting.


To cut, I like the flip the pieces over face (or curly side) down.  It allows me to get to the stem better and cut on both sides of the stem to maximize the amount of kale I am getting off each piece.


Once ready, place in a large bowl.  Drizzle with approximately 1-2 Tbsp of olive oil.  Do not put too much oil on the kale or it will make your chips a little soft instead of the crispy crunchy chips that I like.  I add a little bit of Himalayan sea salt which gives them a slightly different taste than regular sea salt.  Mix well with your hands until all pieces are coated.


Once coated, spread the kale onto a parchment paper covered cookie sheet (I use parchment paper under everything for easy clean up) and sprinkle with a little bit of regular sea salt.  I like to bake my chips at 300 degrees.  If you bake them at a higher temperature, the edges of the chips will cook and burn faster than the inner portion of the chips.  I try to cook them as evenly as I can.  Put them in for 10 minutes and then just keep an eye on them after that.  I try to make sure that all pieces are nice and crispy before I take them out.

Once I take them out of the oven, I like to eat them hot.  I don't generally let them cool too long before I put them in a bowl and start snacking.


They're a great healthy snack that is easy to make and low points (the only thing that counts is your olive oil) on the Weight Watchers plan.

If you've made homemade kale chips before and would like to share your recipe or tips, post them in the comments below.  I'd love to hear what kind of spices you might add to yours or any tricks that you use for getting them crispy and not burnt all the way through.

Saturday, January 5, 2013

From Southern Charm to DIY School Marm

I will admit that my home decor has come a long way in the past few years and my dining room is no exception. What I envisioned as something I coined "Southern Italian" (I'm from the south, Pete's family is Italian) turned into a HUGE failure of a red dining room that I had problems matching accessories to along with a hodge podge of hand-me-down furniture from family.  And part of the "Southern" portion of the dining room was a huge picture of magnolia flowers.  While it reminded me of my grandmother's house and her beautiful magnolia tree, I do have to admit that it was a little cheesy piece of wall art that I picked up from Kirkland's.

After years of trying my best to work with the red color scheme, I'm ready for a change.  I realize that I'm not one of those people who can paint color on the walls and still be okay with it five to ten years down the road.  I like neutrals.  I like to throw in a pop of color here and there and then take it down four months later when I am sick of that color and want a change.  The dining room that we so painstakingly painted in 2004 is getting a face lift this year.  Along with it, home accessories are being re-purposed into fresh new pieces for our home.  One of those items is the magnolia print.  This picture was taken in 2004 not too long after we remodeled the room.  You can see the magnolia print on the wall.

I decided that I wanted a chalkboard and that the frame was perfect for what I was looking for.  The back of the picture was covered in plain brown paper and we carefully cut that off.  Pete pulled out the staples that held the picture tight in the frame and the magnolia print was now loose.  The back of the print was a perfect flat plain surface in which to paint.  I had some leftover chalkboard paint from another DIY project.  I covered the flat back of the magnolia print in four coats of the chalkboard paint.  Each coat dried pretty quickly.  I did leave the chalkboard in the kitchen to dry for 2-3 days just to make sure everything was good and set.  I put the print back in the frame with the chalkboard side now facing out. The magnolia print was still safe on the other side if I ever decided I wanted to display it again (which would probably be never).

And it sat.

And sat.

And sat.

In the bay window of the kitchen where ALL of our sun comes into the house each day from morning to late afternoon.  The magnolia print on the back quickly faded from the sun's heat and rays.  I planned on hanging it in the kitchen and writing our dinner menu on it.  The key word was planned.

So it sat some more.  Until I used it for a newborn photo shoot.

And then it sat some more.

And then one day I decided that I wanted to spruce up the hallway that leads from our entry, beside the stairs, and into the kitchen.  It also houses our laundry area under the stairs.  And I found the perfect space to put the chalkboard.

Please excuse my dark grainy instagram picture

And so it lived there on my wall.

Blank.

For several months.

That was until I saw a DIY Dollar Store Tray Chalkboard on Tonya of Love of Family & Home's blog (while you're there, check out her beautiful home!).  She was even kind enough to include the graphic for readers to replicate her tray.  My chalkboard is much bigger than a tray and without an overhead projector, I had to freehand it (pardon my lack of snowflake drawing skill).  But thanks to her inspiration and lovely fonts, I finally got to use my chalkboard as decoration for our home.


It still looked a little bare for me.  I went outside and cut a few pieces of greenery off of our Leland Cypress trees and tucked them behind the frame.


It could probably have used a little more greenery, but I was happy with the quick 20 minute transformation.


It's something that I can keep up for a few more weeks and then easily change for different holidays.  It's so much prettier and more versatile than the magnolia print.  I'm already thinking of ways that I can decorate it for Valentine's Day.